
Specivo is self-hosted, so the whole thing runs on a server you control: the app, the database, the search index, the background workers. This guide walks through standing up a fresh instance on a small cloud VM, putting it behind HTTPS on your own domain, turning on semantic search, and creating your first project, wiki page, and issue. By the end you'll have a working instance and you'll have seen search find a page using words that never appear in it.
Everything here was run on a brand-new $12/month DigitalOcean droplet (1 vCPU, 2 GB RAM, Ubuntu 24.04). Any provider works — Hetzner, Vultr, a VM on your own hardware — as long as you get a Linux host with root and a public IP.
What you'll end up with
- Specivo running in Docker (app, PostgreSQL, Redis, nginx, and two Celery workers)
- A real Let's Encrypt certificate on your own domain
- Semantic ("by meaning") search switched on
- A demo project with a wiki page and a support issue, and proof that search finds them
The examples use the domain specivo.acmewasterecycling.com. Substitute your own domain wherever you see it.
Before you start
You need three things:
- A server. 2 GB of RAM is the realistic minimum. Specivo runs comfortably at the low end; the embedding model for semantic search is the heaviest single piece, and even that fits in 2 GB for a small team.
- A domain you control, so you can point a subdomain at the server and issue a TLS certificate.
- An SSH key. Cloud providers let you attach your public key when you create the server, which is far safer than password login. The rest of this guide assumes you log in as
rootover SSH with key authentication.
Step 1 — Create the server
In DigitalOcean (or your provider of choice), create a droplet:
- Image: Ubuntu 24.04 LTS
- Plan: Basic, 1 vCPU / 2 GB RAM / 50 GB disk
- Authentication: your SSH key
Note the public IP it gives you. From here on, everything happens over SSH:
ssh root@YOUR_SERVER_IP
Step 2 — Point your domain at the server
Add a DNS A record for your subdomain pointing at the droplet's IP:
specivo.acmewasterecycling.com. A YOUR_SERVER_IP
Do this early. DNS takes a few minutes to propagate, and you'll need it resolving before you can get a certificate in Step 7. Check it with:
dig +short specivo.acmewasterecycling.com
When that prints your droplet's IP, you're ready.
Step 3 — Install Docker
Specivo ships as Docker containers, so the only thing the host needs is Docker and the Compose plugin. Install them from Docker's official repository:
apt-get update
apt-get install -y ca-certificates curl git

install -m 0755 -d /etc/apt/keyrings
curl -fsSL https://download.docker.com/linux/ubuntu/gpg -o /etc/apt/keyrings/docker.asc
chmod a+r /etc/apt/keyrings/docker.asc

echo "deb [arch=$(dpkg --print-architecture) signed-by=/etc/apt/keyrings/docker.asc] \
  https://download.docker.com/linux/ubuntu $(. /etc/os-release && echo $VERSION_CODENAME) stable" \
  > /etc/apt/sources.list.d/docker.list

apt-get update
apt-get install -y docker-ce docker-ce-cli containerd.io docker-buildx-plugin docker-compose-plugin
systemctl enable --now docker
Confirm it works:
docker --version
docker compose version
Step 4 — Get Specivo and configure it
Clone the repository. You only need it for the Compose file and nginx config; the application image itself is pulled from Docker Hub.
cd /opt
git clone https://github.com/specivo/specivo.git
cd specivo
Specivo is configured through two files: .env for non-secret defaults and .env.local for secrets. There's an interactive wizard (make configure), but it's just as easy to write the files directly, which is what you'd do in any automated setup.
First, generate two strong secrets — one for the application's SECRET_KEY, one for the database password:
python3 -c "import secrets; print(secrets.token_hex(64))"   # SECRET_KEY
python3 -c "import secrets; print(secrets.token_hex(16))"   # database password
Create .env (replace the database password and the domain with your own):
COMPOSE_PROJECT_NAME=specivo
SPECIVO_PORT=9933
SPECIVO_DATA_DIR=./specivo-data
SPECIVO_VERSION=latest

DATABASE_URL=postgresql+asyncpg://specivo:YOUR_DB_PASSWORD@db:5432/specivo
POSTGRES_DB=specivo
POSTGRES_USER=specivo
POSTGRES_PASSWORD=YOUR_DB_PASSWORD

REDIS_URL=redis://redis:6379/0

DEBUG=false
REGISTRATION_MODE=invite_only
CAPTCHA_ENABLED=false
CORS_ORIGINS=["https://specivo.acmewasterecycling.com"]
ALLOWED_HOSTS=["specivo.acmewasterecycling.com","localhost","127.0.0.1"]
Create .env.local with your generated key, and lock its permissions:
SECRET_KEY=YOUR_GENERATED_SECRET_KEY
chmod 600 .env.local
A few of those settings are worth understanding:
REGISTRATION_MODE=invite_onlymeans strangers can't sign themselves up on a public URL. Other options areopenanddisabled.ALLOWED_HOSTSandCORS_ORIGINSpin the instance to your domain. WithDEBUG=false, requests arriving with the wrongHostheader are rejected outright.SPECIVO_VERSION=latestis fine to start with. For a deployment you depend on, pin a specific release (for example0.1.9) so upgrades are something you choose rather than something that happens to you.
Finally, create the data directories that the containers mount for persistent storage:
mkdir -p specivo-data/{postgresql,redis,attachments,themes,models,logs/nginx,logs/app}
Step 5 — Start the stack
docker compose up -d
The first run downloads the images and can take a minute. The API container's entrypoint waits for the database, applies all migrations, and seeds the default trackers, statuses, and priorities — you don't run any of that by hand. Watch it come up:
docker compose ps
When api and db report healthy, you have six containers running: nginx, api, db (PostgreSQL with pgvector), redis, celery-worker, and celery-beat. At this point the app answers on port 9933 inside the server, but nothing is exposed to the world yet — that's the next two steps.
Step 6 — Create your first admin
There's no public sign-up for the very first account; you create it from the command line.
Don't call it
admin. Automated login attacks start with the obvious usernames —admin,administrator,root— and pair them with password dictionaries. Choosing a non-obvious username means an attacker has to guess two unknowns instead of one, and almost every drive-by brute-force attempt fails on the username alone. Use something specific to you, likealex.opsormwiggins.
Generate a strong password and create the account:
docker compose exec api python -m specivo.cli.admin create \
  --login alex.ops --email [email protected] --password 'a-long-random-password'
This account can create projects, invite the rest of your team, and manage everything from the web UI.
Step 7 — Put it behind HTTPS
Right now the app speaks plain HTTP on port 9933. The clean way to expose it is to run nginx on the host as a reverse proxy: it terminates TLS on ports 80/443 and forwards to Specivo's container. Install nginx and Certbot:
apt-get install -y nginx certbot python3-certbot-nginx
Create the site config at /etc/nginx/sites-available/specivo.acmewasterecycling.com:
server {
    listen 80;
    listen [::]:80;
    server_name specivo.acmewasterecycling.com;

    # Allow large attachment uploads
    client_max_body_size 50m;

    location / {
        proxy_pass http://127.0.0.1:9933;
        proxy_http_version 1.1;
        proxy_set_header Host              $host;
        proxy_set_header X-Real-IP         $remote_addr;
        proxy_set_header X-Forwarded-For   $proxy_add_x_forwarded_for;
        proxy_set_header X-Forwarded-Proto $scheme;
        proxy_set_header Upgrade           $http_upgrade;
        proxy_set_header Connection        "upgrade";
        proxy_read_timeout 120s;
    }
}
Enable it, drop the default site, and reload:
ln -sf /etc/nginx/sites-available/specivo.acmewasterecycling.com /etc/nginx/sites-enabled/
rm -f /etc/nginx/sites-enabled/default
nginx -t && systemctl reload nginx
Now get a certificate. Certbot edits the nginx config for you, adds the HTTPS server block, and sets up a redirect from HTTP:
certbot --nginx -d specivo.acmewasterecycling.com \
  --non-interactive --agree-tos -m [email protected] --redirect
Open https://specivo.acmewasterecycling.com and you should see the sign-in page over a valid certificate. Certbot also installs a renewal timer, so the certificate refreshes itself before it expires.
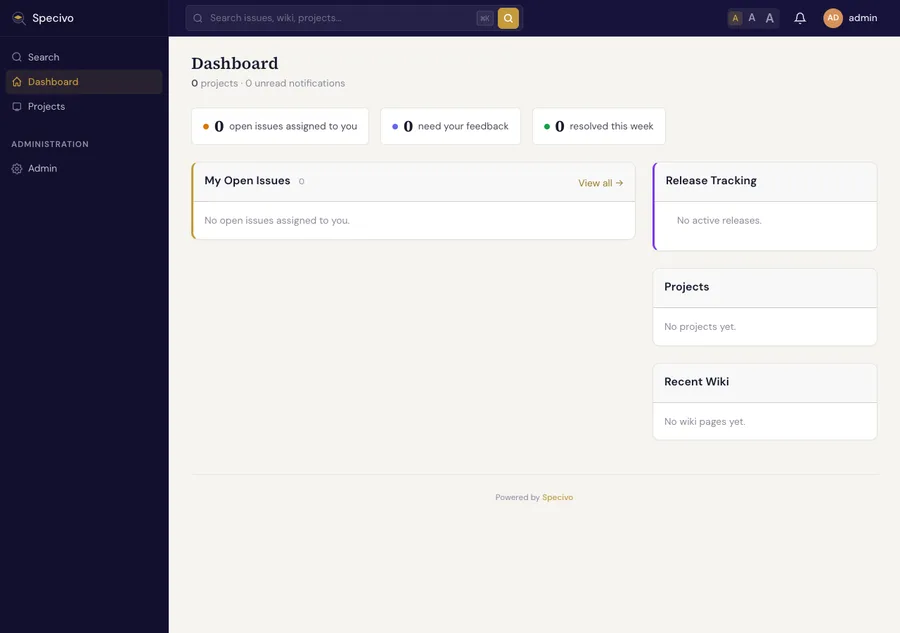
Sign in with the admin account you created. The first thing you'll see is an empty dashboard:
Step 8 — Close the back door
There's one loose end. Docker publishes container ports by writing iptables rules directly, which sail straight past ufw. So even with a firewall, port 9933 may still be reachable from the internet — letting people hit the app over plain HTTP and bypass your certificate.
Fix it by binding the published port to localhost only. Edit the nginx service's port mapping in docker-compose.yml:
    ports:
      - "127.0.0.1:${SPECIVO_PORT:-9933}:80"
Recreate the container and turn on a basic firewall (allow SSH first, so you don't lock yourself out):
docker compose up -d nginx

ufw allow OpenSSH
ufw allow "Nginx Full"
ufw --force enable
Now 9933 answers only to the host nginx over the loopback interface; the public can reach Specivo only through HTTPS on 443.
Step 9 — Turn on semantic search
Out of the box, search matches on words (PostgreSQL full-text search). Semantic search adds matching by meaning — a query like "garbage truck collection days" can find a page about "emptying residential bins on a weekly rotation," even with no words in common. It runs on an on-device model with no external API calls.
Download the model (multilingual-e5-small, MIT-licensed, ~400 MB):
cd /opt/specivo
bash scripts/download-model.sh
The files land in specivo-data/models/. Restart the app so it picks them up, then embed anything that already exists:
docker compose restart api celery-worker celery-beat
docker compose exec api python -m specivo.cli.backfill_embeddings
You'll see it report the model loading and the number of issues and wiki pages it indexed. From now on, new content is embedded automatically in the background as you create it. (On a 1-vCPU box the model takes a few seconds per batch — fine for a small team. If your instance is very write-heavy, give it a second core.)
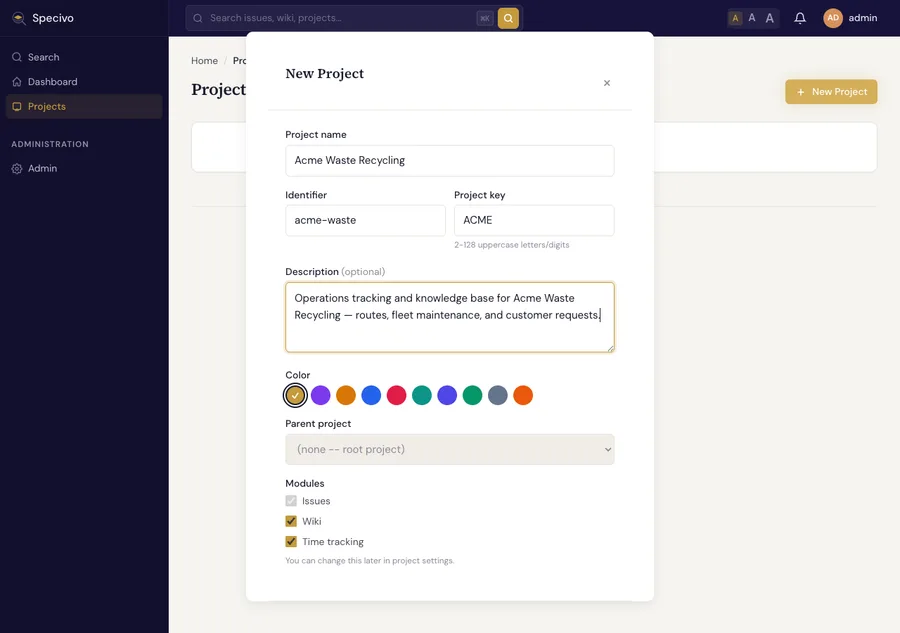
Step 10 — Create a project
The rest is in the browser. From Projects → New Project, give it a name, a short identifier, and an uppercase key (the key prefixes every issue, like ACME-1). Issues are always on; Wiki and Time tracking are optional modules.
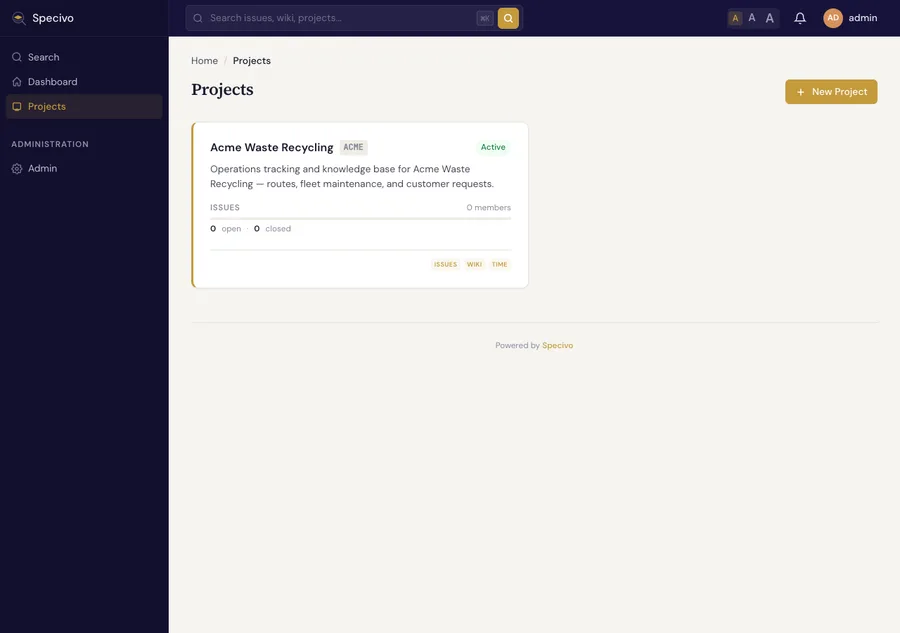
After you create it, the project shows up with its modules:
Step 11 — Write a wiki page
Open the project's Wiki and choose New Page. The editor is Markdown, with a live preview and a slug generated from the title.
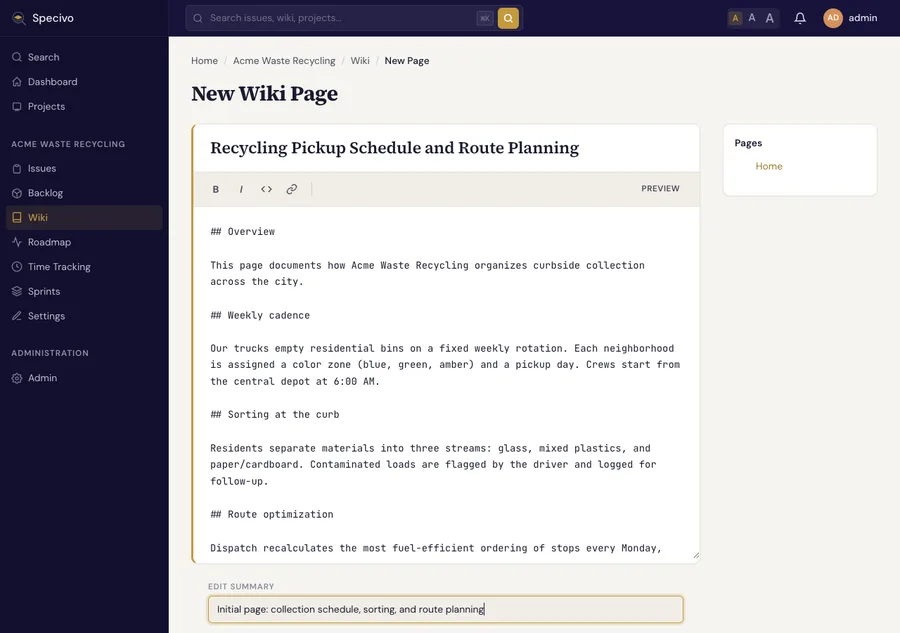
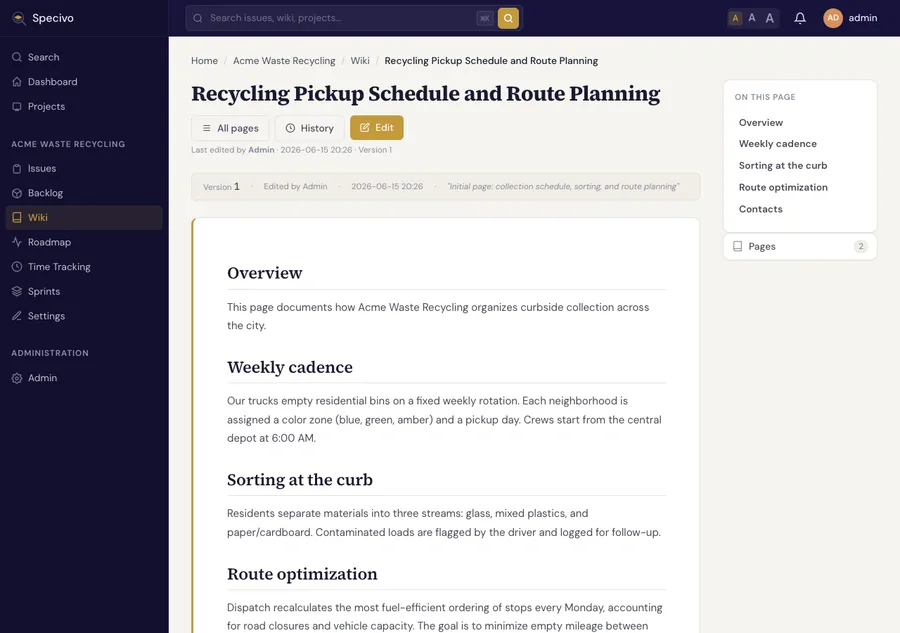
Save, and Specivo renders it with a table of contents built from your headings. Every save is versioned, so you can see the history and roll back.
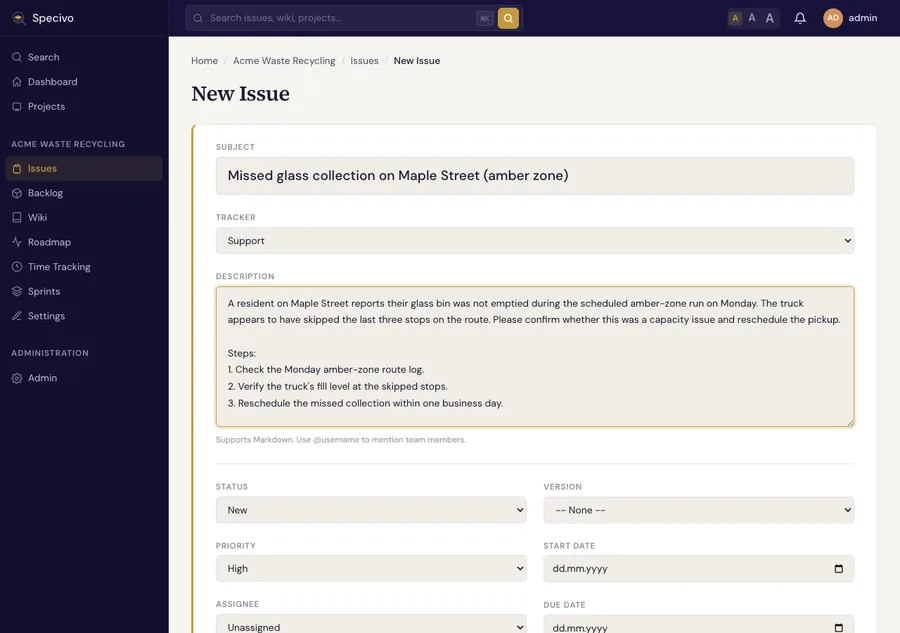
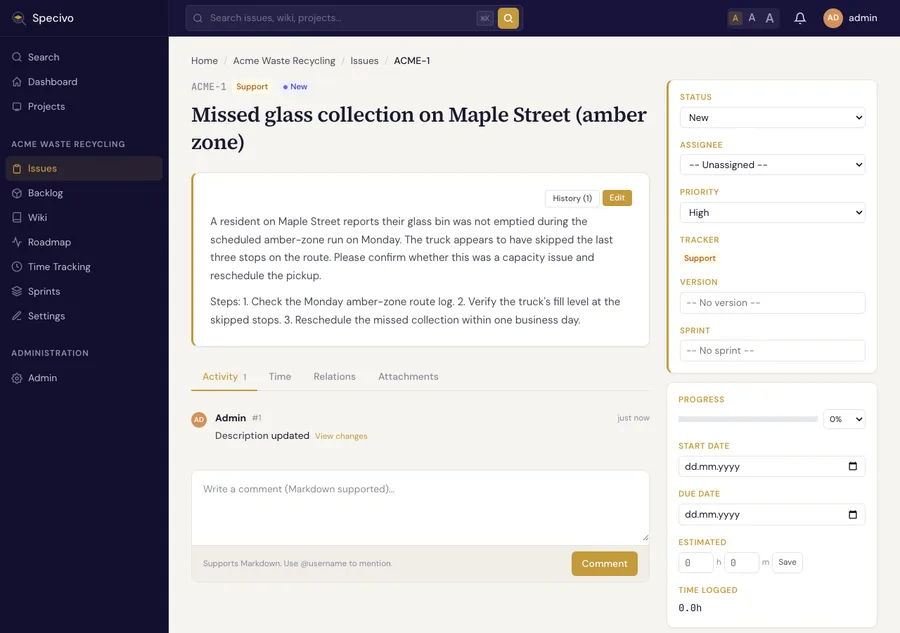
Step 12 — Create an issue
From the project's Issues, click New Issue. Pick a tracker (Bug, Feature, Task, Support), write a subject and a Markdown description, and set a priority.
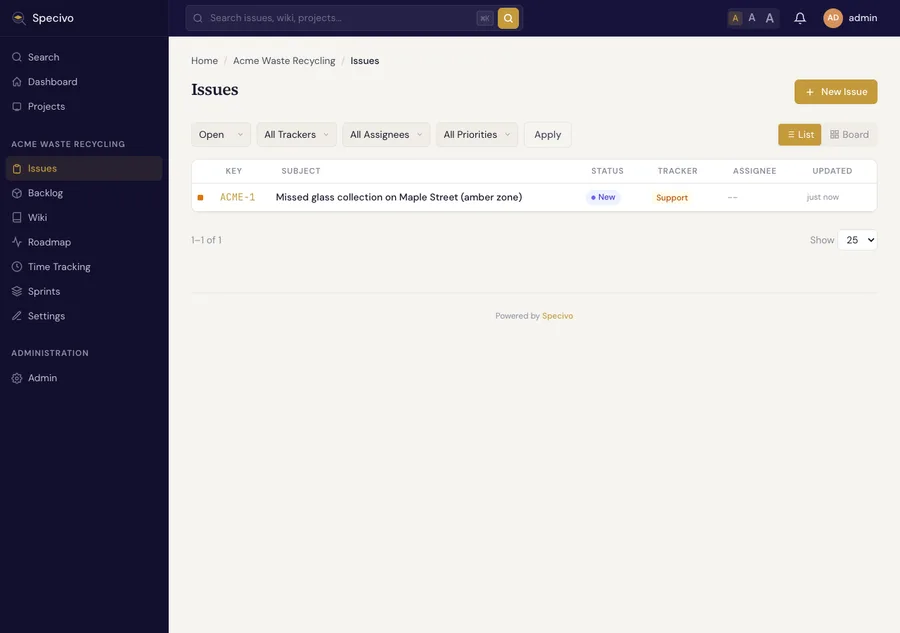
It lands in the issue list with its generated key:
The issue detail page is where the work happens — status, comments, relations to other issues, attachments, and time entries:
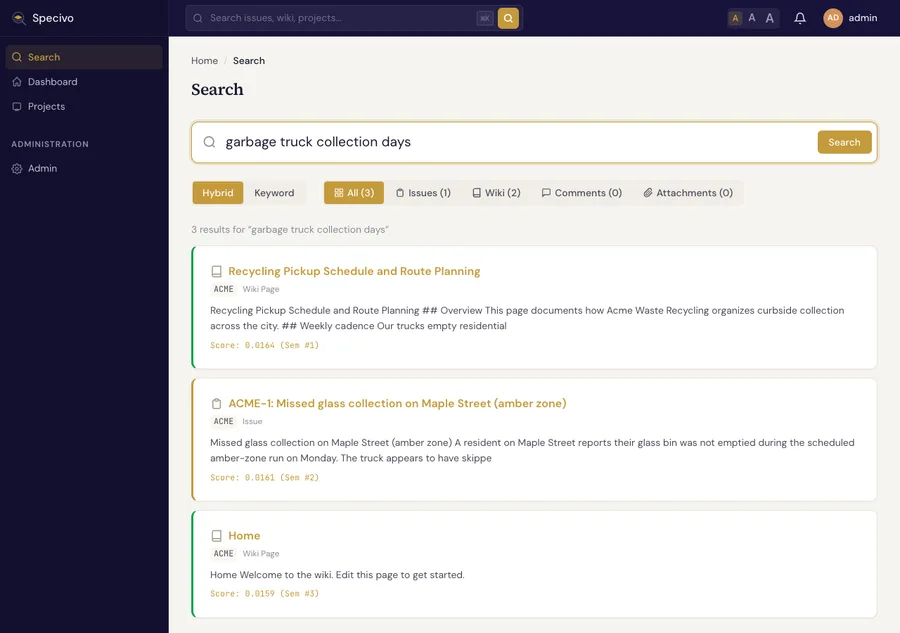
Step 13 — Prove that search works
This is the payoff. Open Search and run a query that describes the wiki page without using any of its words. Try "garbage truck collection days". The page says nothing about "garbage," "trucks," or "days"; it talks about "emptying residential bins on a weekly rotation." With Hybrid mode on, it comes back as the top result anyway, with the issue close behind:
Switch the same query to Keyword mode and you get nothing — because none of those exact words appear in the content:
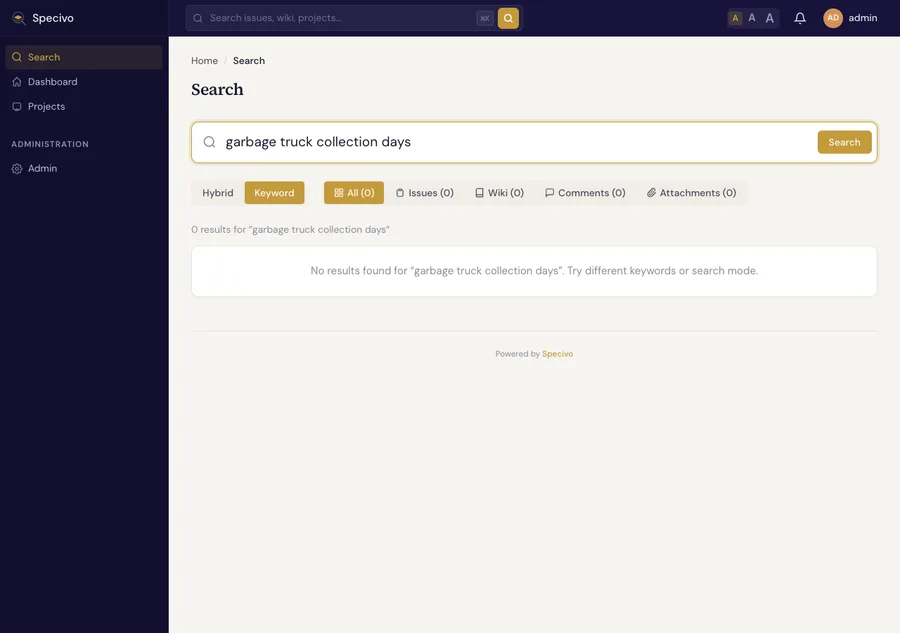
That contrast is the whole point of semantic search: people find what they're looking for even when they don't remember the exact wording your team used.
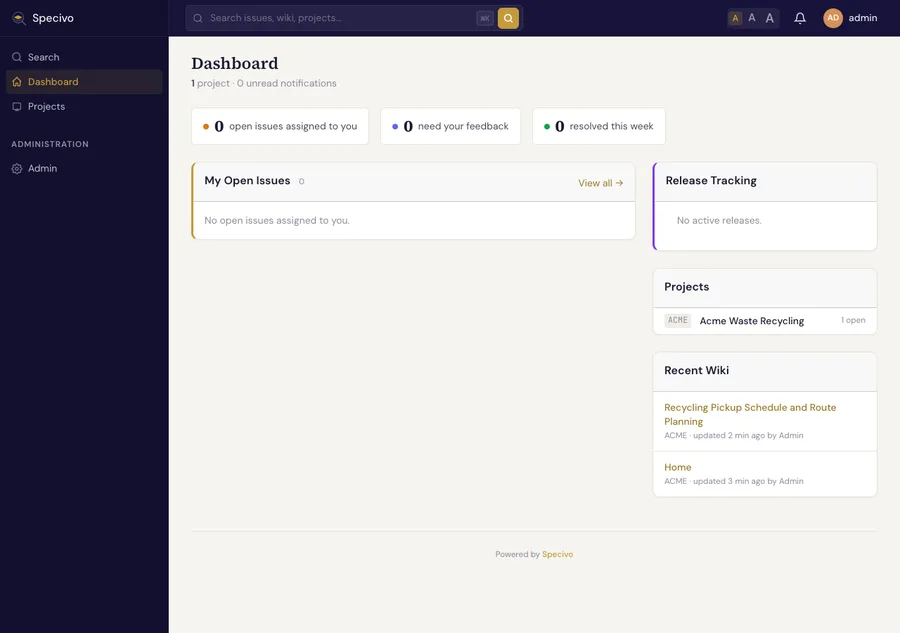
Back on the dashboard, your project, issue, and recent wiki activity are now all visible at a glance:
A production checklist
Before you put real work into the instance:
- Set a unique
SECRET_KEYin.env.local(you did this in Step 4 — just don't ship the bundled default). - Pin
SPECIVO_VERSIONto a specific release instead oflatest. - Keep
REGISTRATION_MODEclosed (invite_onlyordisabled) on any public URL. - Back up two things together: a PostgreSQL dump and the
specivo-data/directory (attachments, logs, the model). Restoring one without the other leaves you half a system. - Watch memory on a 2 GB box. The stack plus the embedding model is comfortable for a small team, but if you run other services on the same host, give it more headroom or a swap file.
What's running, and what it costs
A default install is six containers: nginx (the front door), the API, PostgreSQL with pgvector (this is also your search index, so there's no Elasticsearch to operate), Redis (cache and task broker), and two Celery processes for background jobs like embedding and notifications. On the 2 GB droplet used here, the whole stack with semantic search enabled sits comfortably within RAM with room to spare. You don't stand up a managed database, an external search service, or a message queue separately. It's the one host and the containers on it.
That's the entire setup: a server, a domain, Docker, and a certificate, and you own every byte of it.
Keeping it up to date
New Specivo releases ship as new specivo/specivo images. Upgrading is deliberate and quick — back up, pin the new version, pull, and restart, and the container applies any new migrations on startup. When you're ready to move to a newer release, follow How to upgrade a self-hosted Specivo instance.